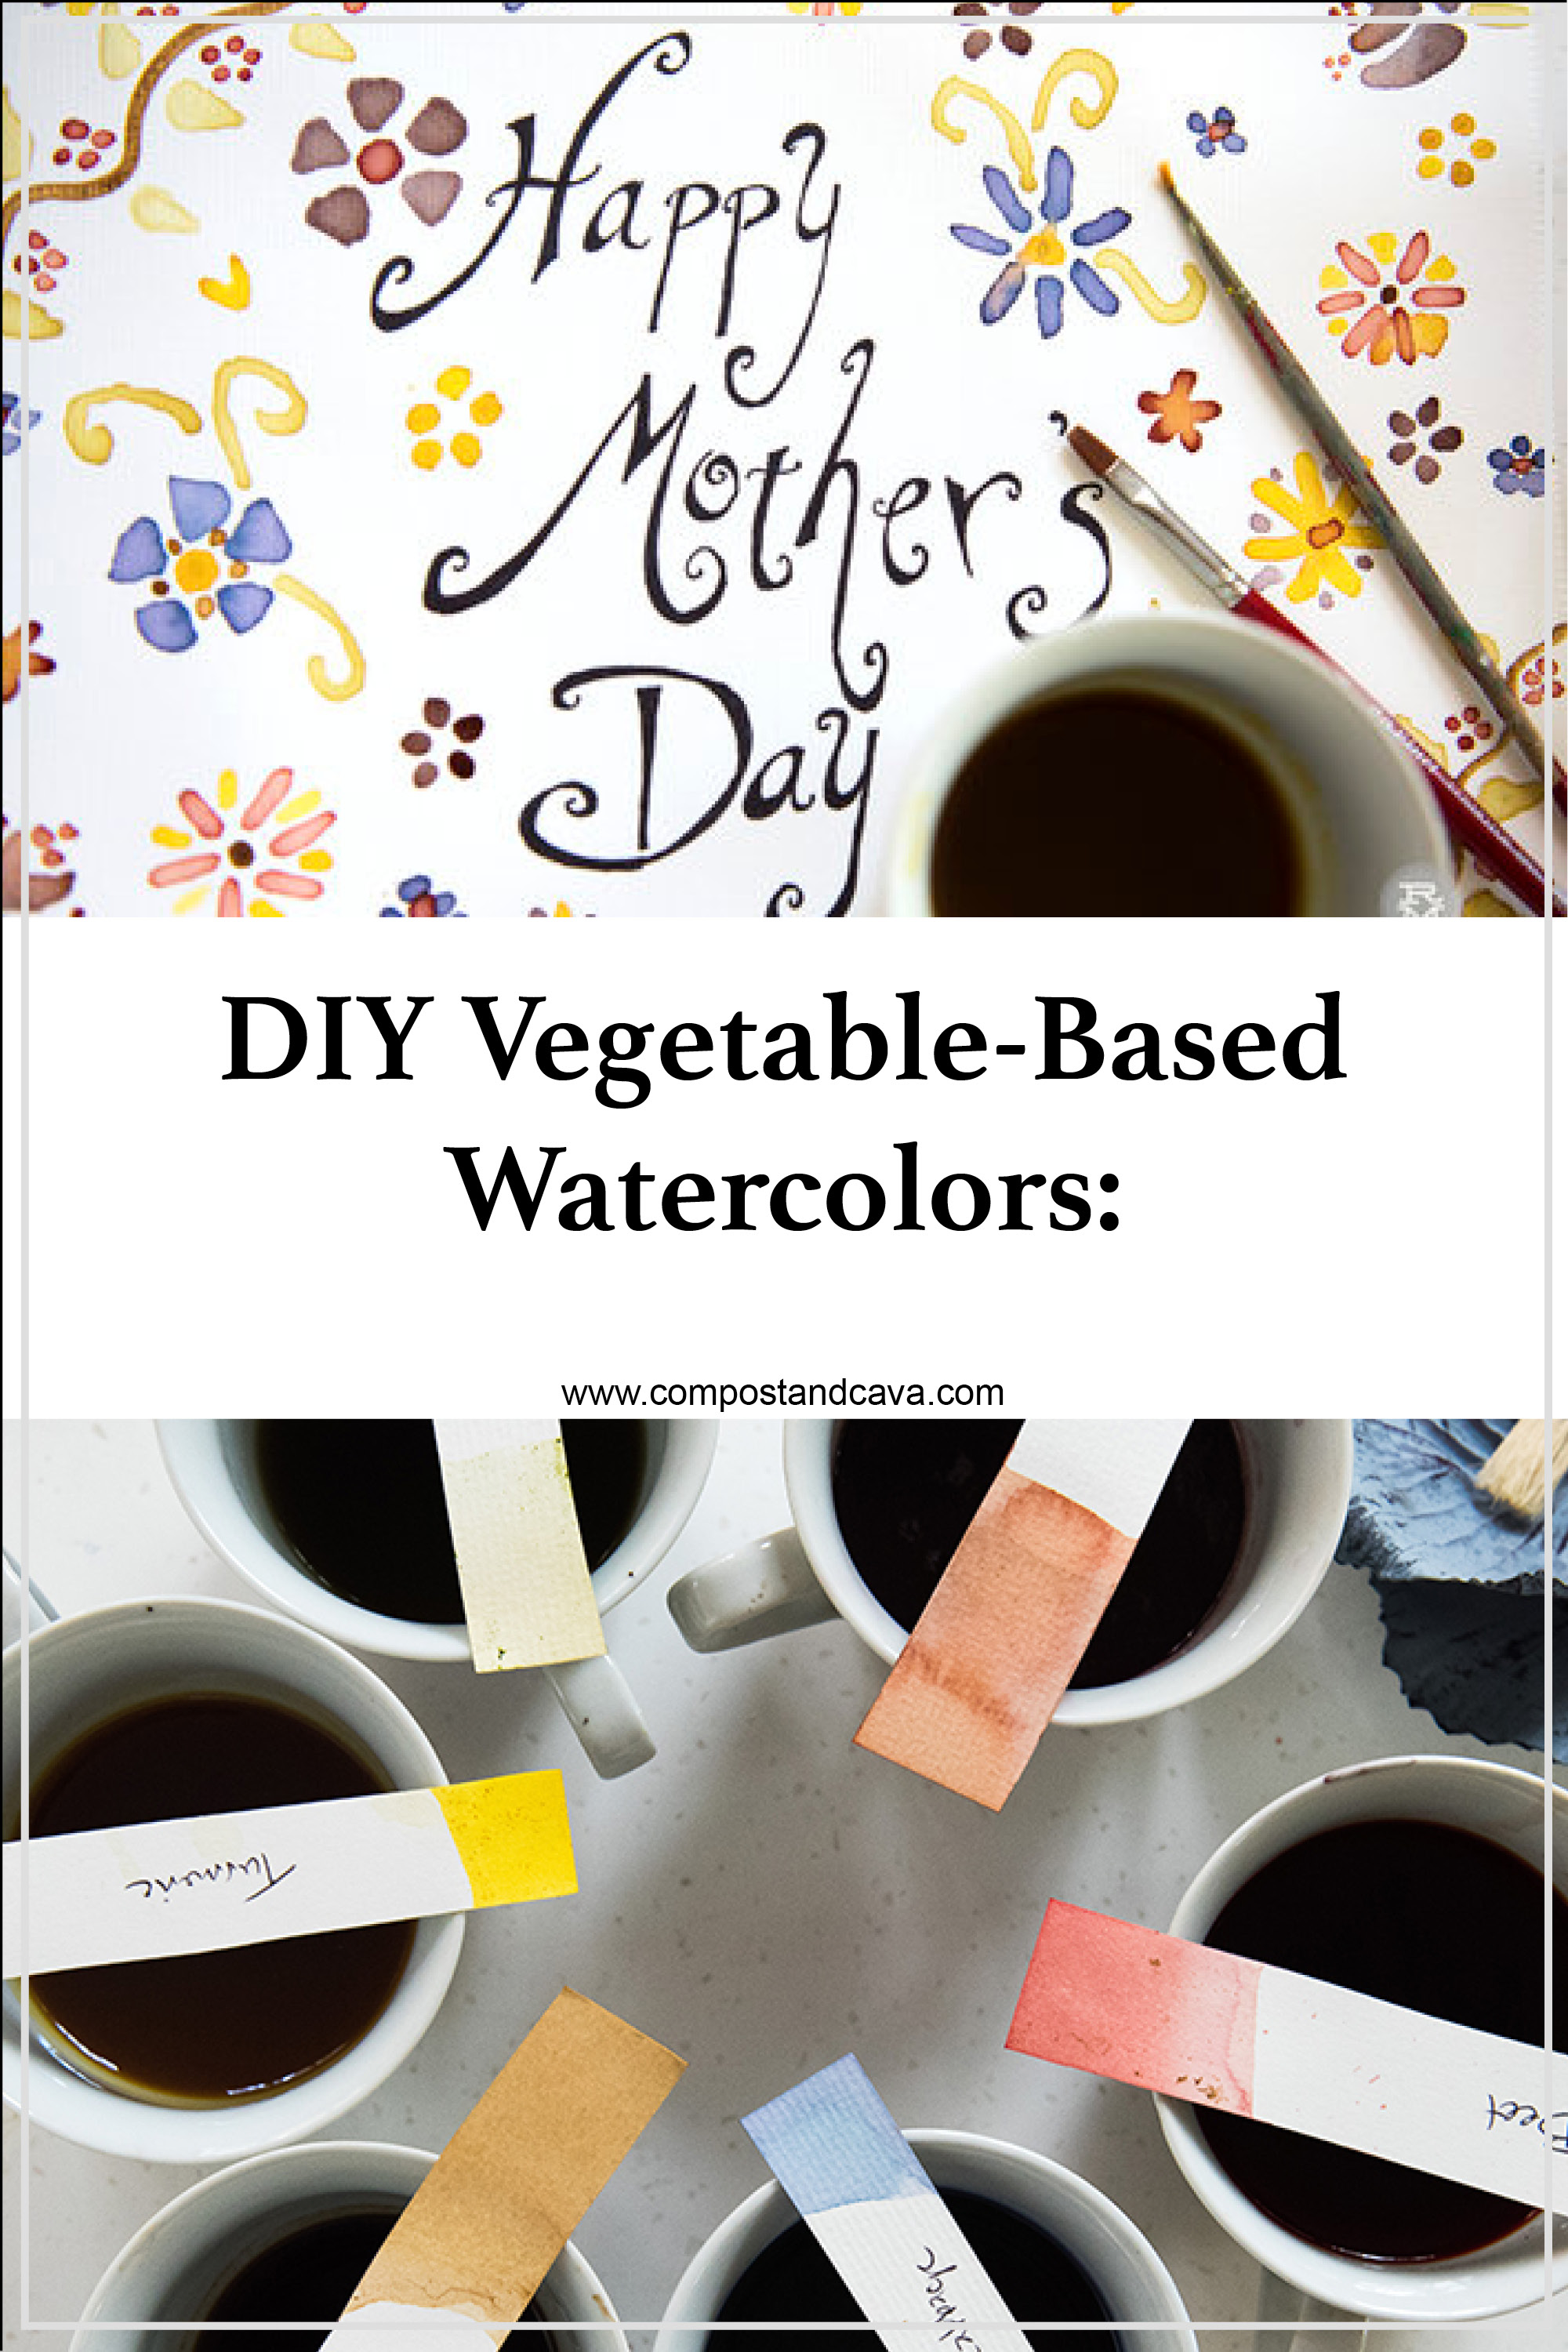
DIY Vegetable-Based Watercolors!
/*This gallery contains affiliate links. This means that if you click through and give the product a whirl, I get a tiny fee for spreading the news at no extra cost to you. This helps me offset the enormous amount of time that goes into Compost & Cava.

I used to sit next to this kid named William with big glasses in the second grade who constantly ate little bits of Elmer's glue and crayons when the teachers weren't looking. He's probably a radiologist or something now, but I remember thinking it wasn't a good idea. What's in that stuff, anyway?
I shared this memory with a friend while chopping some beets, and suddenly I had an idea. Was it possible to make REALLY non-toxic crafting materials? Just because something is non-toxic doesn't mean it's good for you (I'm looking at you, Willie) or ok to pour it down the drain.
Get ready to play with your food: We're making DIY vegetable-based watercolors!
I did this craft with my 9-year-old niece when I was in Florida, and we had so much fun! It was really special watching her explore the world around her and come to see her food differently, as something filled with endless potential.
Not only did we have a blast, but I loved knowing these DIY vegetable-based watercolors were not only totally safe for her and the other kids (none of them are paint-eaters, by the way) but safe for the environment. You can pour them down the drain without a second thought, compost the scraps, and easily make these paints without generating any plastic trash - which is a huge win for someone constantly vexed by the excessive packaging of many crafting supplies. And if your kids do somehow wind up eating these paints? The worst that will probably happen is they'll get some extra vitamin C. Boom!

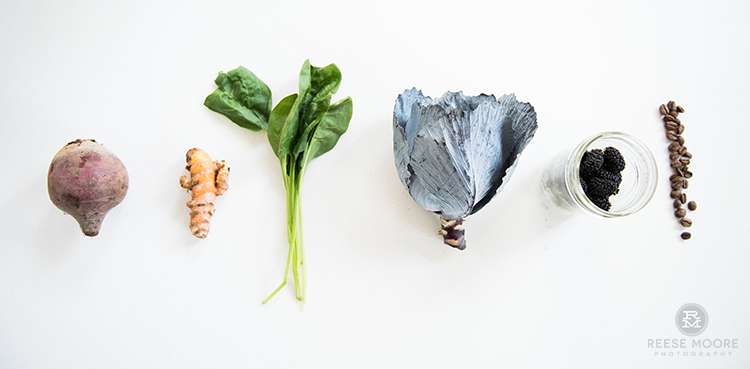
Ingredients:
Turmeric root (yellow)
Purple cabbage (blue, purple, or pink)
Mulberries (rust)
Coffee (brown)
Spinach (green)
Beet (red)
Reese's notes: I used mulberries because they were in season and easily foraged from a generous neighbor's tree. These ingredients are just suggestions! Play with your food and explore your own DIY vegetable-based watercolors. Green was the hardest color to render, and some ingredients, such as mulberries, may lose their vibrancy if boiled. More on that shortly.
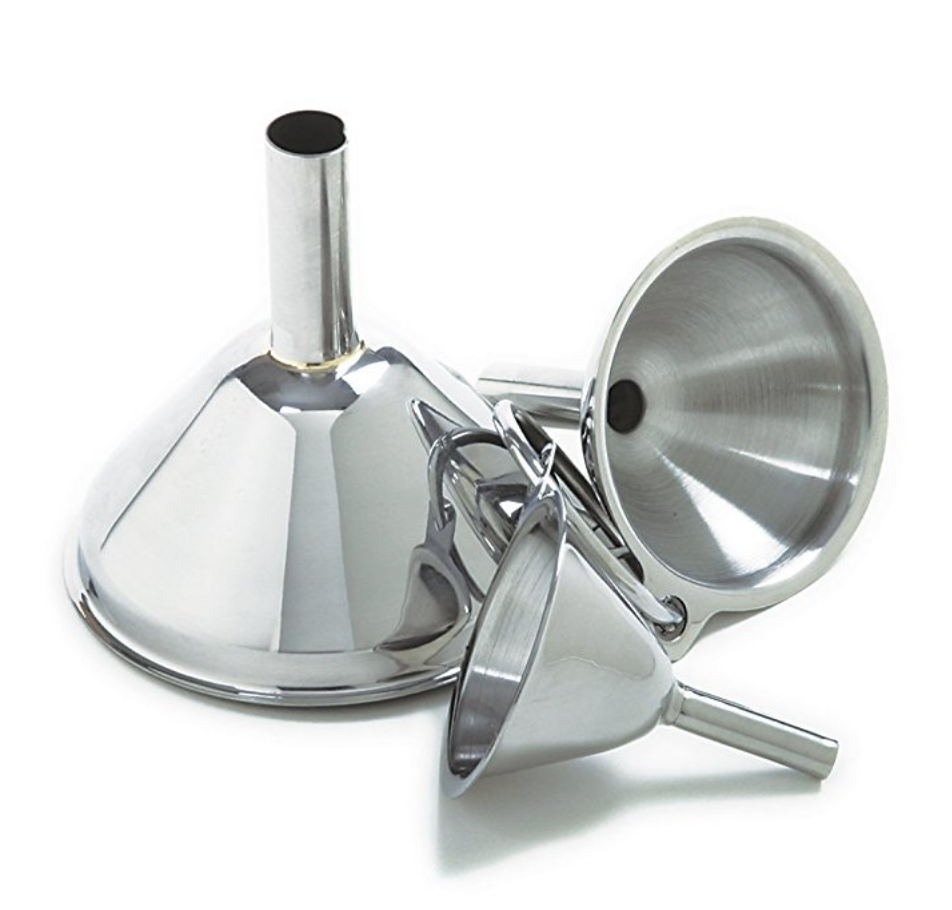
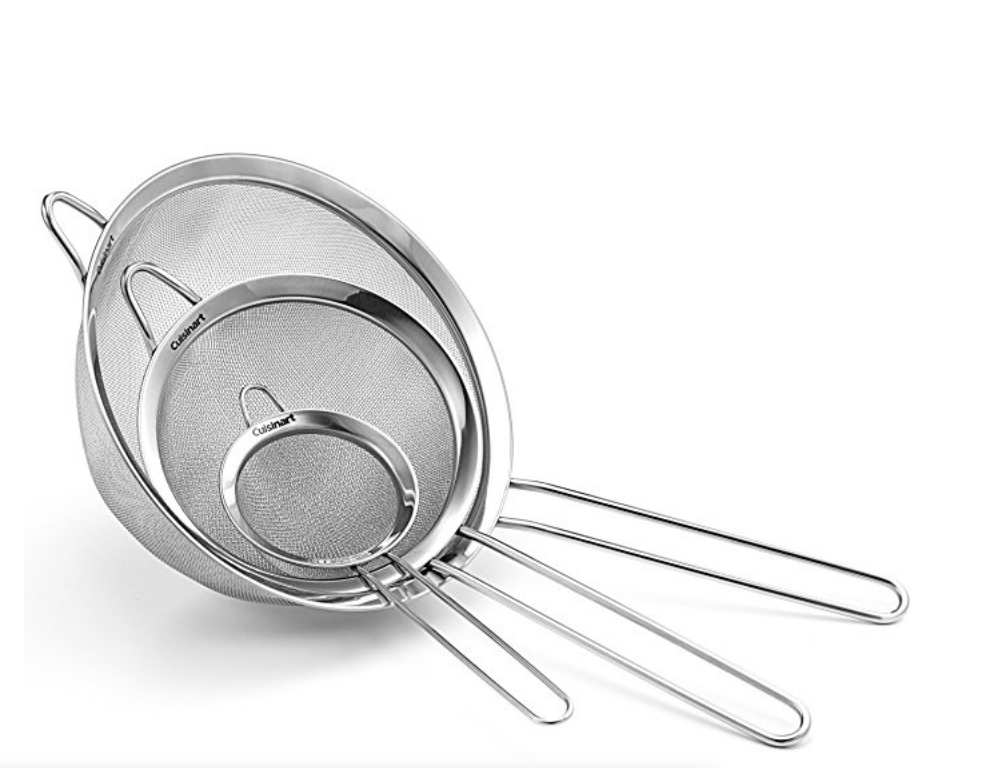
Other Items You'll Need:
Cutting board
Sharp knife
Cheesecloth or old metal coffee filter (do NOT use paper or one you use regularly, unless you're into cabbage flavors in your morning roast)
Funnel
Cups for paint (plastic may become stained)
Brushes
Whole sheets of watercolor paper
Strips of watercolor paper to use as test strips
Small pots
Stove
Making Your DIY Vegetable-Based Watercolors:
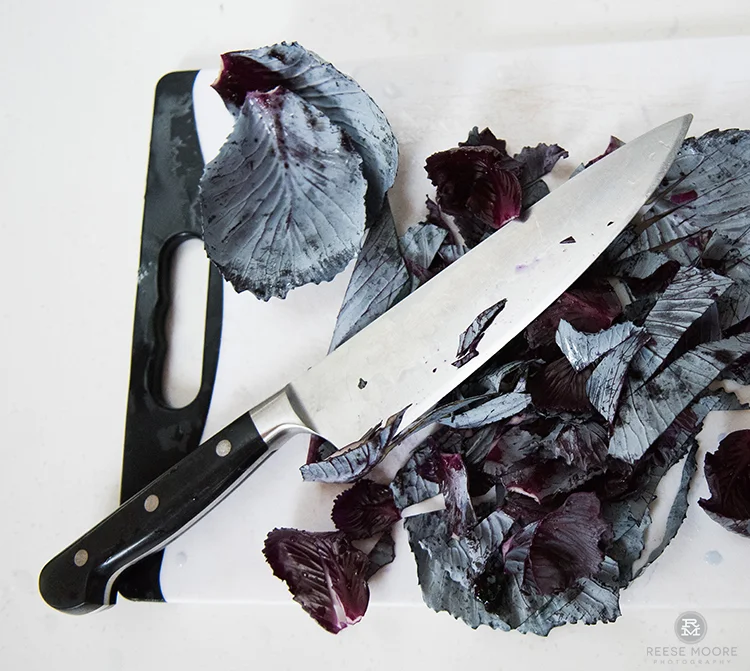
Not all ingredients will handle the same way, so I'll start with the coolest veggie on the list: purple cabbage. Cabbage is cool? Who knew!
Purple cabbage is pH sensitive, as I learned through trial, error, and Google.
You know what that means? If your water is alkaline, your cabbage will turn the water blue-green. If it's neutral, it'll be a gorgeous deep blue. If it's acidic, it will turn bright pink. HOW NUTS IS THAT? You can actually make all three colors from one batch of cabbage paint by adding acidic (think lemon juice) or basic (baking soda) to the solution.
There is a catch though, the cabbage paint may react to your other paints. The OCD among us may panic at this, but my niece and I decided it was totally awesome. The cabbage paint added some mystery to the whole process and the bleeding from blue to pink made for incredibly cool effects.
As a reminder, turmeric will stain everything.

Finally, as I learned in a previous DIY fail, mulberries have incredible color... but it can be very fragile when exposed to high heat for a prolonged amount of time.
Roughly chop vegetable for paint. Add to pot.
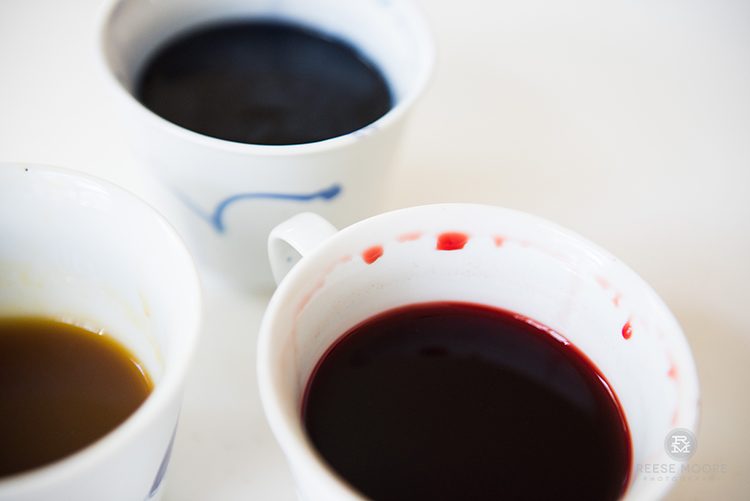
I combined roughly a ratio of 1/3 food matter to 2/3 water, brought to a boil, and cooked the pigment down until desired hue was reached. This was about 10-20 minutes, depending on the ingredient.
Test the vibrancy of your paints by dipping test strips into veggie solution and let cool - and don't worry if the mixture cooks down to what looks like only a tiny bit. A little bit of watercolor goes a long way!
If you're using mulberries or a similarly fragile pigment, skip the boil. Use 2/3 vegetable matter to 1/3 water, roughly chop and add to food processor.
Let paint cool, if needed.
Place funnel over container to be used to house paint. Drape cheese cloth inside funnel, pour paint through cheese cloth to remove chunks and impurities. Repeat, if desired.
Assign particular brush for cabbage-based paints to prevent color bleed.
Make art!
Reese's note: If you're using spinach, you'll want to mash it into the cheesecloth to extract as much watercolor as possible. Spinach tends to slurp the liquid back up during the cooling process.

Lettering was done using permanent pen prior to painting.
I'm in love with these soft, earthy hues.

I haven't done a watercolor in a long time, and it was so relaxing. Unlike my niece, who dove in with paintbrushes flying, I was a little fastidious about my painting. But watercolor has mind of its own, and I soon fell in love with the irregularities. I love the unexpected bleed of the cabbage paint, and started intentionally dripping tiny drops of other pigments into still-wet paint. The dark edges of the dried paints are beautiful and so unique, too.
Cora just dove in and did the damn thing, however, and I'll be honest, I sort of have ombre envy. I'm no expert, but I'll say the girl is already on her way to becoming a fearless artist.

When we were done I poured our vegetable-based watercolor paints down the sink without a second thought, though I could just have easily poured them into a potted plant. The rest of the waste went into the compost! It was guilt-free crafting at its finest.
Finally, can we all take a moment for how Cora signed her painting? Love that she clarified her relationship to my sister, just in case Laurie forgot how exactly she knew Cora. Laurie does have three kids, after all, so I suppose there was no harm in adding that "aka your daughter" on there.
Happy Mother's Day, y'all! Get out there and make something beautiful!